


Sometimes your designs require that some part of your web page be restricted to be accessed provided certain conditions have been met. You might be infuriated that your contents are being stolen by simple copy paste and so you want to disable text selection. Whatever the situation, disabling text selection highlighting shouldn’t be a complex task to accomplish. You can make use of simple CSS for the approach while at the same time opt for Javascript and jquery. In this tutorial we will be focusing on disable text selection highlighting with user-select property and other relevant options using JavaScript, CSS and HTML.
If you are wondering about what text selection highlighting means, then let me explain to you visually. Try hovering over these tutorial texts. As the pointer appears to be a cursor, try copying the content by selecting the tutorial contents. You can do that right? That’s because text selection highlight is not altered in this page. So, in this tutorial, we are looking into several ways to disable the text selection highlighting with HTML, CSS and JavaScript.
Learn to Disable Text Selection Highlighting Using HTML, CSS and JavaScript
Whenever you plan to develop something over your pages, You’ve got to explore every possible ways on how that can be accomplished. Sometimes, achieving the final objective mightn’t always be the solution. The way to develop, approaches you decide for leaves a huge impact on the performance of your page and may very well allow simple development as your code complexity increases.
So, Let’s look at the approaches separately under following different ways.
1. Disable Text Selection Highlighting in HTML with CSS user-select:none
We can use CSS property user-select for the purpose of disabling the text selection highlighting. Though it hasn’t yet been established as a standard property, all modern browsers support the property with exception including IE 9 and earlier versions
First of all lets create a basic HTML structure with div elements containing texts which needs to be disabled for selection highligthing using CSS. I’ve used two different div so as to differentiate the text selection highlighting disabled with enabled/ default feature.
<div>
    You can select and copy this Content.
</div>
<div class="select_disabled">
    You can't select and copy this Content
</div>
Here we go. Now we will disable the select_disabled div element using CSS and see how it turns out.
.select_disabled{
    user-select: none; /* For Chrome and Opera */
   -ms-user-select: none; /* For Internet Edge and Explorer*/
   -webkit-user-select: none; /* For Safari */
   -moz-user-select: none; /* For Firefox */
   -khtml-user-select: none; /* Konqueror HTML */
}
Here, The use of vendor prefix on user-select is a must, at least as of now though chrome and opera support prefix-less user-select property. In the above CSS, for each browser the same user-select property requires their own vendor prefix. For example to support user-select property on on mozilla, we need to add -moz- prefix before the property. The comment part explains the use of prefix for each different browser support.

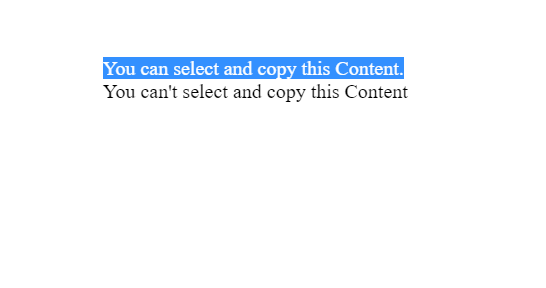
The above screenshot show how the first text could easily be highlighted with selection while the second text isn’t highlighted. It’s because we’ve set the user select property of the second text to none to disable the text selection highlighting.
CSS user-select:auto
The value auto is the default value present in the property user-select, so that means it behave normal and text selected will be highlighted. But another important feature of the auto is that it takes on the value of the parent element. To check that, Lets see the following HTML
div class="select_disabled">
This text is disabled by setting the user-select property to text none
<div class="select_auto">
  The user-select property for this text is set to auto
  </div>
</div>
Now lets add the the CSS for select_auto. We’ve already set the CSS of select_disabled CSS.
.select_auto{
  user-select: auto; /* supported by Chrome and Opera */
   -webkit-user-select: auto; /* Safari */
   -khtml-user-select: auto; /* Konqueror HTML */
   -moz-user-select: auto; /* Firefox */
   -ms-user-select: auto; /* Internet Explorer/Edge */
}
2. Disable Text Selection Highlighting in HTML with CSS ::selection pseudo-element
The user-select property explicitly sets the restriction to the selection of text. However ::selection pseudo-element tends to apply styles to element or a part of the document displayed which has been highlighted by user. Let’s set two different elements in our HTML structure as given below.
<div> You can select this content as usual</div>
<p> You can't select this content as usual</p>
We will be adding styles to the p tag using ::selection pseudo-element. Let do that with the code below.
p::selection {
        color: none;
        background: none;
    }
    /* For Mozilla Firefox */
    p::-moz-selection {
        color: none;
        background: none;
    }
Here, we have set the color and background to none explicitly setting the changes of highlights to none. You may also observe the use of -moz- selection. This is used for legacy firebox browser of version 61 and earlier versions. Also, I’ve provided another way to achieve the similar functionality with same feature in the below CSS code.
p::selection {
        background: transparent;
    }
    /* For Mozilla Firefox */
p::-moz-selection {
        background: ;transparent
}
The above code simply sets the background to transparent, which hence clearly eliminates the text selection highlighting.
3. Disable Text Selection Highlighting Using attr()
Above approaches are the direct approach, to disable the text selection highlighting. However, we have another option which basically isn’t meant to be used for disabling text selection, but still works just fine. In this approach we will be using attr() CSS function which returns the value of the attribte of the selected element. It isn’t the recommended process but like I said we will be exploring several possible ways to disable text selection.
First of all, lets understand how we will be making use of attr() function, but before that lets look the HTML code below that might make the explanation bit easier.
<p class="disabled_selection" disabled_txt="These are the text created by after which you can't select"></p>
Okay, we’ve created a p gave it a class but there exists a different attribute with surprising value. This is a user defined attribute-value pair which we will be exploiting on our CSS.
.disabled_selection:after {
    content: attr(disabled_text);
}
Okay we have used after selector to disabled_selection which adds the content after the selected element which in our case is the disabled_selection. This means that the above CSS adds the content after the disabled_selection class. The content in this case is set to the returned value of attr() which returns the value of the attribute. The attribute given to the attr() is disabled_text whose value is set as These are the text created by after which you can't select that means the attr() function retrieves that value. Now as we run the program, the screen displays the value of our user defined attribute.
Now since the text so displayed is the value of attribute returned by the attr() function it doesn’t inherit the property of text to be highlighting when selected. And there you have it, a hack to disable text selection highlighting.
One of the situation where this way might be useful is when you want text selection highlight to be disabled for some of the contents while the rest can still be selected. The following example with :before selector should explain the concept.
Divided Text Selection Highlighting with :before
Okay, this concept is exactly same to the above concept with a bit modification of using :before selector which adds the content before element.
<p class="before_attr" disabled_text="Hello "> World</p>The code above simply displays the World. And as you can see we have defined our own attribute disabled_text setting its value to Hello. Our final objective here is to display Hello World and not just World. For that we will be using :before selector just as we have used :after selector to add contents after the element. Okay, So Now lets add the CSS code below to make it display Hello World and not just World.
.before_attr:before{
  content:attr(disabled_text);
}
Okay what’s new with this code, Can you find out? Yes you can see now Hello World being displayed, but that’s not the only whole point of adding hello with :before selector. Try selecting World and then Hello, you will find World gets highlighted but Hello won’t be selected. That’s because hello is the value of attribute returned by our attr() function.
The screenshot below should verify the concept. The background and the bold text are just some basic CSS adjustment that I did to make it presentable. If you haven’t added any more CSS then you should see the basic text over the default background. The objective is just to show the difference of text selection highlighting.


Just FYI, you could add World as the value of our own defined attribute and Hello as the default text within the p tag. and use :after selector just as the above section. Try experimenting.
4. Disable Text Selection Highlighting Using MouseEvent Property
In this section we will be exploring the usage of MouseEvent to disable the text Selection highlighting. Just like that of number 3 approach, this approach isn’t technically the direct approach to disable the text selection highlighting, though it’s unique property makes it suitable to be used for the mentioned purpose.
Okay, Let’s get on to the basics. We’ve create a HTML structure as below with two different mouseEvents ready to be triggered.
<div>Can I be selected</div>
<div class="mouseEvent1" onmousedown="return false">1. I can't be selected</div>
<div class="mouseEvent2" onselectStart="return false">2.I Can't be selected</div>
We’ve set the value of both event to return false. The first event onmousedown is triggered whenever mouse button is pressed. And as the mouse button is pressed to select the text, the return false value disables the text selection highlighting.
Similarly, onselectStart gets triggered when the selection is started and does produce the same result as that of onmousedown event.We have used these events inline with our HTML code which are actually Javascript event. So, later on as we discuss the use of Javascript to disable the text selection highlighting, we will be making use of this section html structure.
5. Disable User Select Highlighting using JavaScript
The basic approach to disable user select highlighting using JavaScript is it’s use in changing the CSS property of the element. So for basics, lets add following HTML
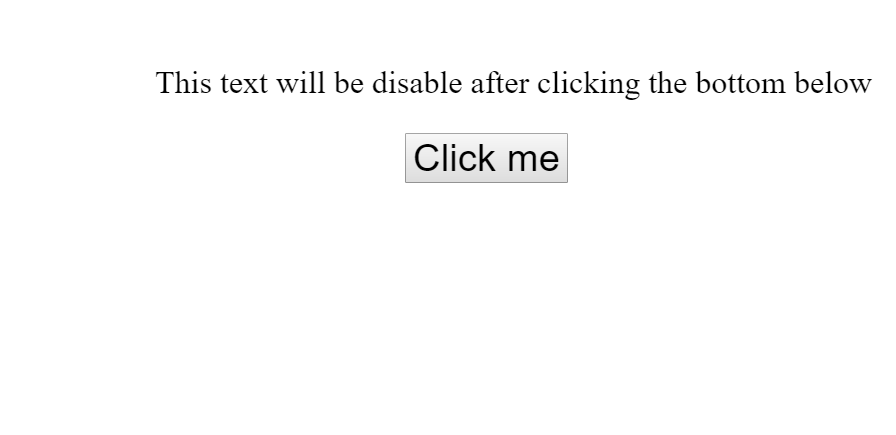
<p id="Js_triggered">This text will be disable after clicking the bottom below</p>
<button onClick="funct()">Click me</button>
The first tag element simply contains the basic text which we will be checking for enable or disable feature of text selection highlighting. And we will use button beneath to trigger the JavaScript function as the button is clicked.
So, Now lets see how our Javascript function works. Add the following JS code within your script tag.
function funct() {
  var xyz = document.getElementById("Js_triggered");
  xyz.style.WebkitUserSelect = "none"; /*Chrome, Safari, Opera*/
  xyz.style.MozUserSelect = "none"; /* Firefox*/
  xyz.style.msUserSelect = "none"; /* IE 10+*/
  xyz.style.userSelect = "none"; /* Standard syntax*/
}
Well the code is simple. firstly we selected the particular DOM element on var xyz and set its user-select style each for different vendor prefix to none. Now before clicking the button try selecting the paragraph. Highlights just fine, right? Now select the button. Then try selecting the p element. The selection won’t be highlighted.
Don’t get intimated with the screenshot below, if you’ve followed through the tutorial and didn’t get the final result as the picture below. I have tweaked some CSS to make it appear a little presentable than what it should have appeared. I had aligned the contents to center and added primitive level designs to button . However, The objective of the picture is to show that the text could be highlighted as still yet the click me button isn’t clicked and so the text highlight hasn’t been disabled.


Now, lets click the Click me button and see the effects. Now you can clearly experience inability to select the text as you could have done previously. With as much effort you can put, still the screenshot should look like below even after trying to select the text.

Event Cancelling
Like usual, first lets create the text on HTML.
<div>This text cannot be Selected and highlighted</div>When you interact with a web page, the basic structure is given by HTML. But whatever you do within the page after the page has loaded is basically handled by JavaScript. Your interaction to the web site is referred as an event for example: clicking the mouse, closing the window, resizing etc. Those events are handled by JavaScript. There are several event handler in JavaScript. Here we will be focusing on the one which handles the text selection event.
Now, when we start selecting a text, we trigger a event called onselectstart. We will be using the corresponding event handler to disable the highlight feature of text-selection.
onselectstart = (e) => {
  e.preventDefault()
  }
The event onselectstart is cancellable event. That means the effect that the particular event can display by default can be cancelled. For that we have preventDefault() method which cancels any cancellable event. So the above JS code simply cancels the selection event thereby disabling the text selection highlight.
Alternatively following JS code also works fine
onselectstart = (e) => {
  return false;
  }
Alternatively, we can write the above CSS can alternatively as follow
document.onmousedown = function(){
    return false;
  }
Well, this keeps on going. I hope you got the basic idea.
Conclusion
Disabling the text selection highlighting isn’t a complex task. You can achieve the text-selection disable feature with pure CSS without the need for Javascript. Further more the use of JavaScript makes the process even more dynamic. In this tutorial we discussed some basic HTML, CSS and JavaScript approach to disable text selection highlights. Moving on, You could opt for jquery and and other better options for Javascript. Coz, lets face it, this tutorial yet tries to cover most of the approaches, still lots of processes are out there. In my opinion, using Javascript to disable text selection is one hectic of a job so it would be better to implement the feature without Javascript except in dynamic cases where you actually needs its usage.
Still I reiterate the approach depends on the application you are developing. Okay, that it for now. Congrats, You held through.